How to change my Centurylink wifi password in 1 minute? (2 EASY ways)
Changing the wifi password can be too complicated if you don't know the right way.
That is why we decided to gather all the information about how to change my CenturyLink wifi password easily and quickly here in this post.
We would first draw out a general idea of CenturyLink initial password, then point out some reasons you should change it before showing you how to change Centurylink wifi password.
Keep reading!
Change CenturyLink wifi password
What is the CenturyLink default Wifi password?
‘Default password’ indicates the password set to your router when it’s new and out-of-the-box.
This password is set up by the manufacturer and it’s the same for all batches.
On some different devices, the default credentials would be found on the admin page.
Normally, the username is blank and the password is 1234.

Change my CenturyLink wifi password
Can I change my CenturyLink wifi password? The answer is YES. But why should get CenturyLink password change and how to change Centurylink password, keep reading to discover.
Why should I change my CenturyLink wifi password?
There’s no doubt that changing the wifi password is the first and foremost thing you should do after getting one.
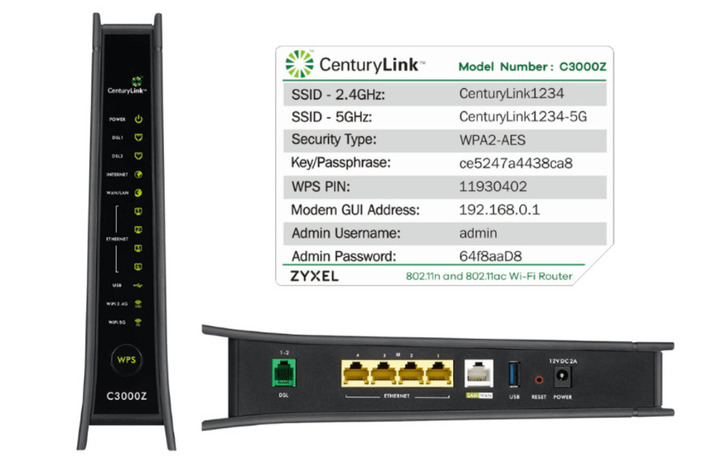
The reason for Centurylink change password is very simple, the password of the new wifi is often written on the back of your router box or on the router itself (depending on brand and devices), so making the password yours is a way to secure the network.
You don’t want many people to use your wifi because if it’s not strong enough, you will get a very poor wireless signal.
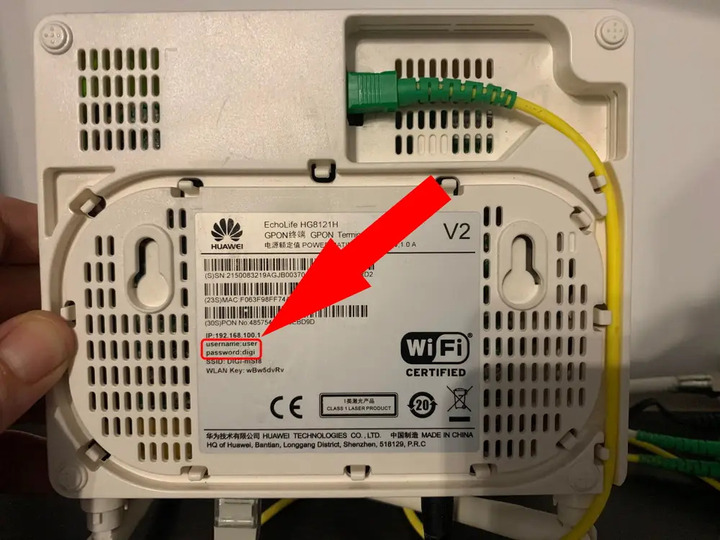
Wifi password is written on the router
There are many reasons for Centurylink change wifi password as follows, which can also apply to changing Virgin Media Wifi password.
Firstly, with a password of your own, you’re going to control the number of people or devices using it. It’s easier for you to identify thefts if you know who is using your wifi.
Secondly, As aforementioned, wifi has limitations on the number of devices connected to it.
In case many people use your wifi at the same time, the internet speed will slow down dramatically. You can take a wifi speed test to check it.
For some reasons above, you should consider changing the wifi password at least once every three months.
How to change my CenturyLink wifi password?
How to change my wifi password CenturyLink can be done easily in two ways: either via the Centurylink admin login or via your router.
To do this, what you need is your wifi router and a desktop or laptop connected to the wifi network.
If you do not have a computer, don’t worry, you can change the wifi password on your smartphone.
Use CenturyLink app
If you have new modems, this is the easiest way to do it.
Step 1: Make sure you have ‘my CenturyLink app’: If not, you need to download Centurylink app. You can go to App Store or Play Store on your phone and download it.
Step 2: After the download is completed, open the app and log in/sign up to the app.
Step 3: Navigate ‘My products’
Step 4: Choose ‘Control your wifi’
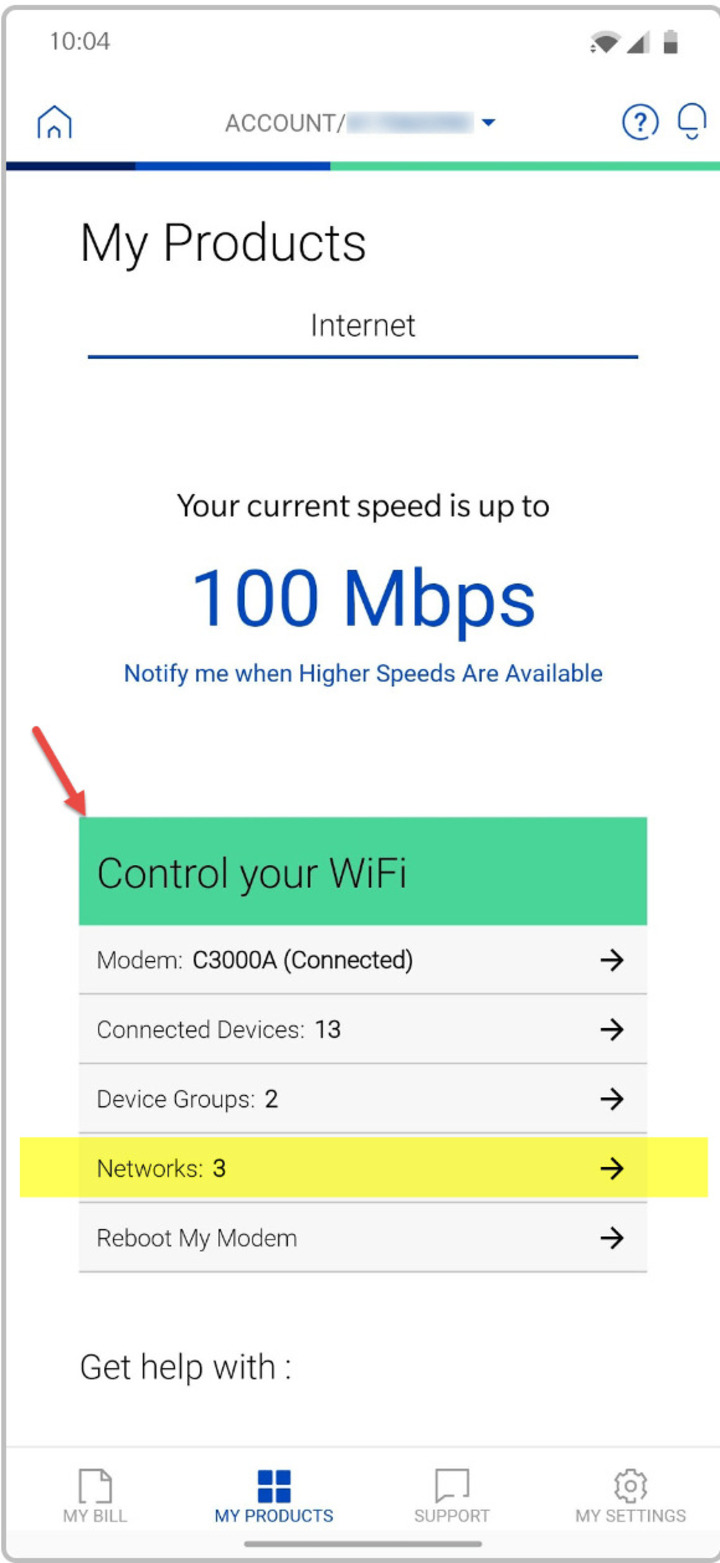
Choose ‘Control your wifi’
Step 5: Next tab ‘Network’
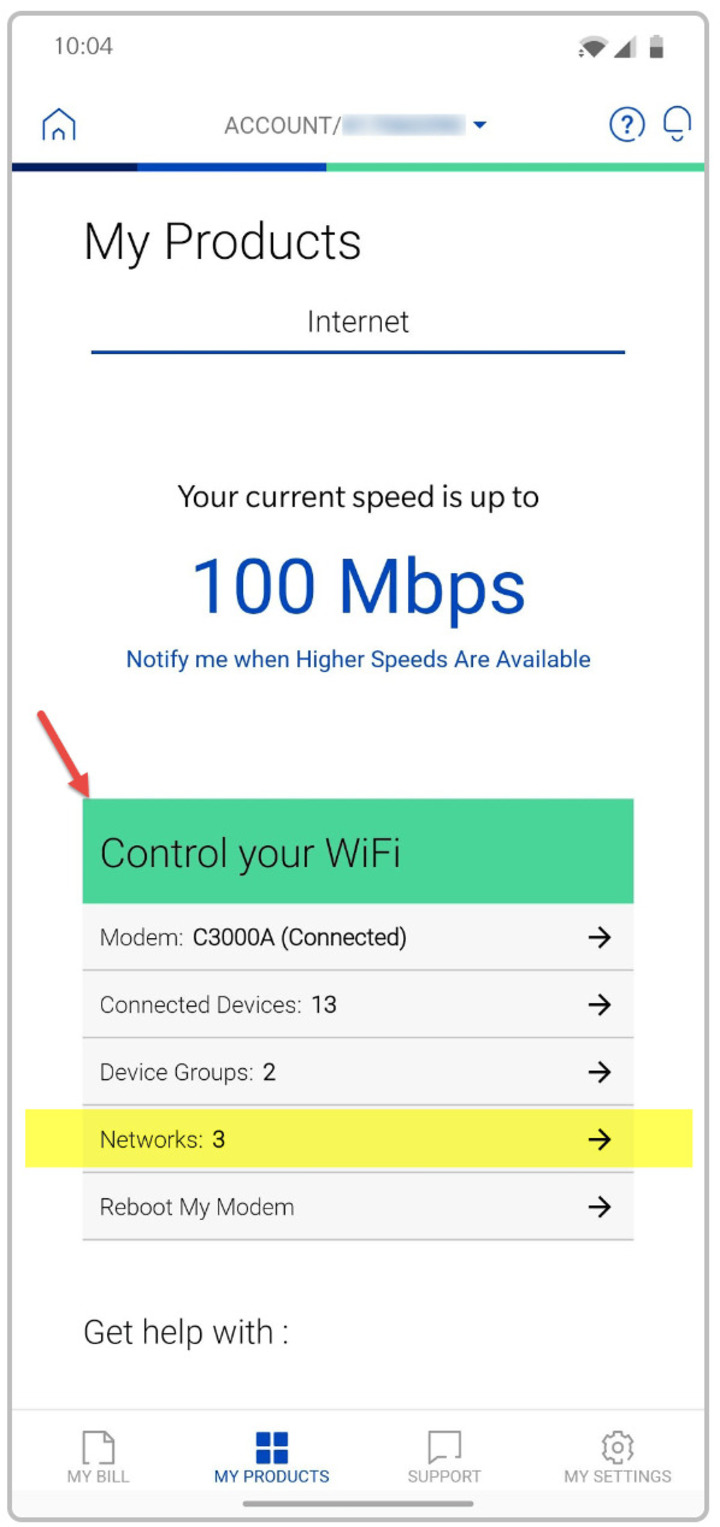
Tab ‘Network’
Step 6: Select ‘change my Wifi Password’ and fill in your desired password
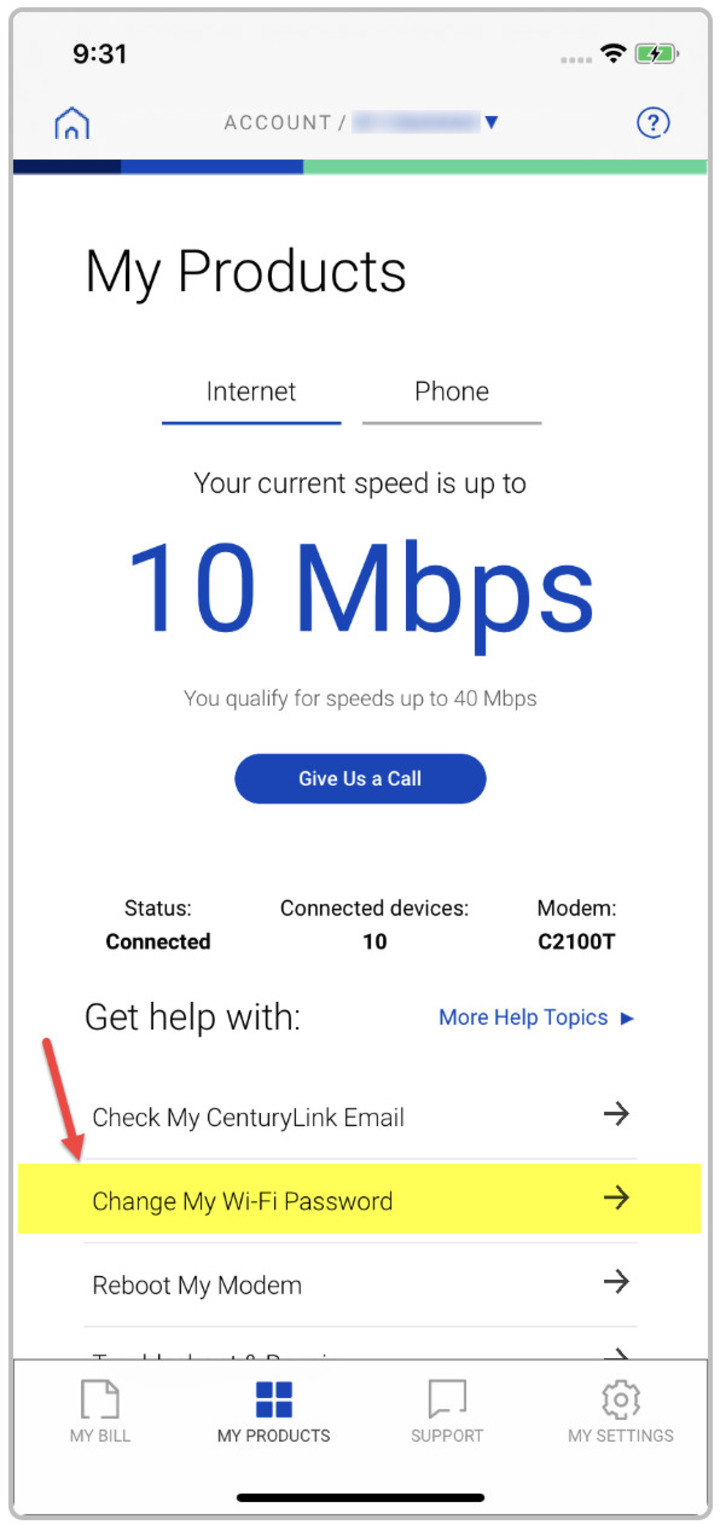
Insert your password
If you are successful after trying these steps then congrats. If you cannot find the ‘Change wifi password’ option on the app, don’t worry each device will show differently.
What if you can’t find the “Change Wi-Fi Password” Option on the App
You can try several methods below:
-
Updating ‘My CenturyLink’ app, ensure you got the latest version.
-
Double-check if the modem is fully plugged in and got power.
-
Navigate ‘test my service’ and then run a troubleshooter to check the network issues.
-
Restart the modem: you can simply unplug the cable at the back of the modem and wait for 2 minutes then plug it back.
-
If all of these suggestions don’t work, you may need help from a service agent.
Use modem settings
Wonder how to change my CenturyLink wifi name and password? The second method is through Centurylink modem login.
Follow these simple steps:
Step 1: Connect your device (it could be a laptop, computer, or phone) to the internet through a wireless connection or using an Ethernet cable.
Step 2: Launch a web browse and type: http://192.168.01
Step 3: Log in using your Admin Username and password. Note that this information is different from SSID and wifi password.
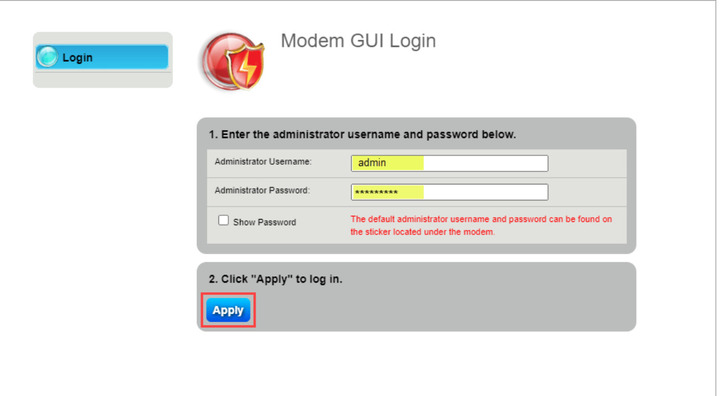
Log in using your Admin Username and password
Step 4: After logging in successfully, select the ‘Wireless setup’ icon in the main menu
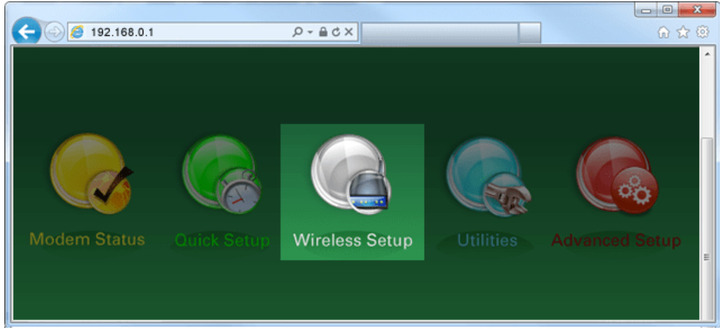
Select the ‘Wireless setup’
Step 5: Select Wireless security on the left of the menu.
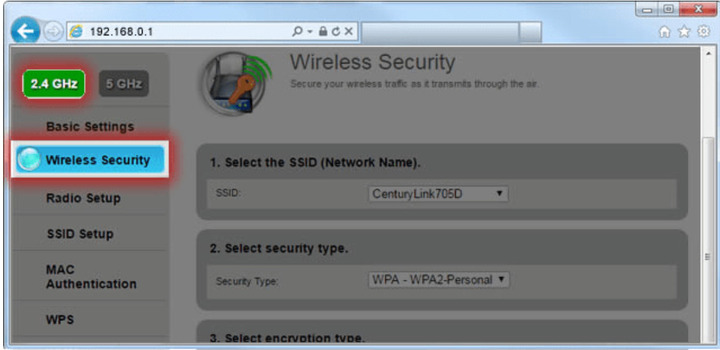
Select Wireless security
Step 6: The first column is SSID, you should find this information on the modem.
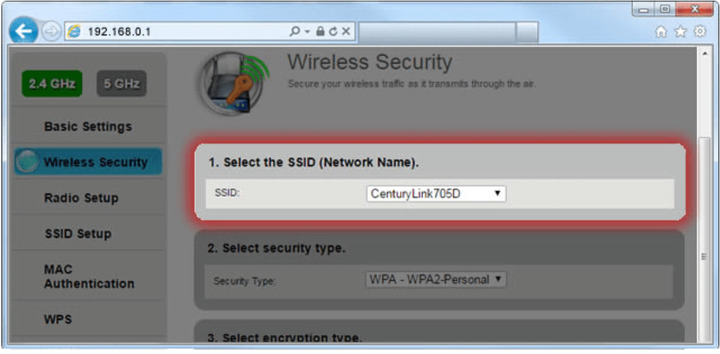
Select SSID
Step 7: In the select security types, choose ‘Both’. An Authentication type window will pop up.
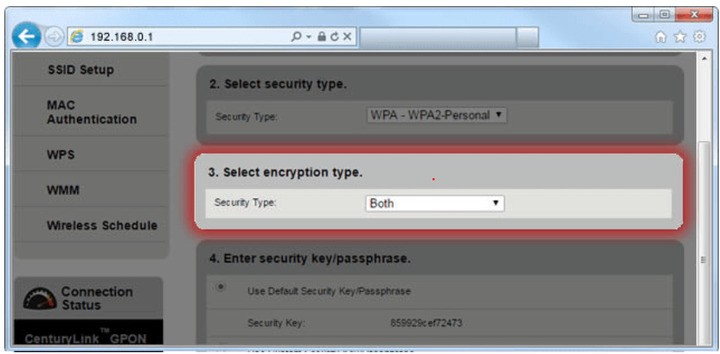 Choose ‘both’ in Select encryption type
Step 8: Now select ‘Use Custom Security Key/Passphrase to change the password.
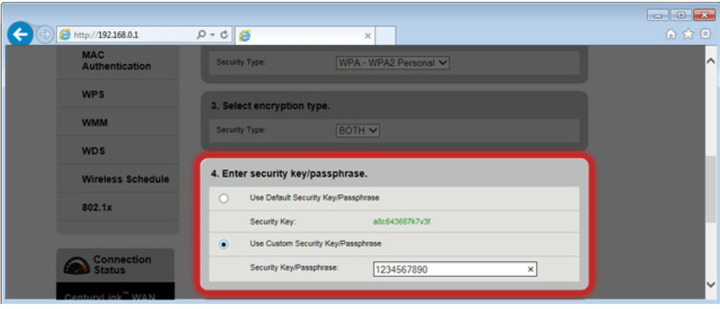
Select ‘Use Custom security Key/Passphrase to change the password.
Step 9: After that, choose ‘Apply’ and then you’re done.
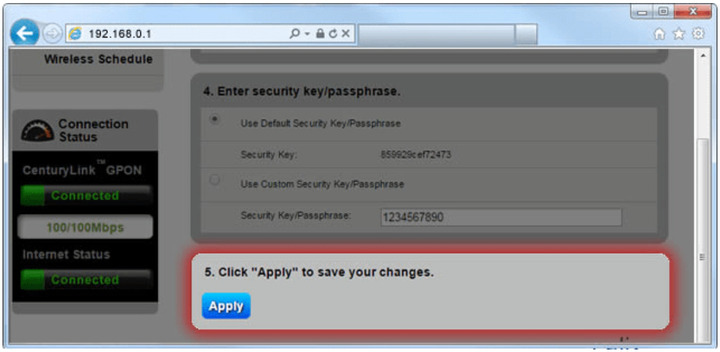
Choose ‘Apply’
How do I reset my CenturyLink wifi password?
By now, we hope you are clear about how to change wifi password Centurylink.
However, if you unexpectedly forget either wifi password or router admin page password, you should reset your wifi password.
Please note that once you choose this option, all the previous Centurylink wifi settings on your routers like the network name, password, etc will be lost.
This would be done manually.
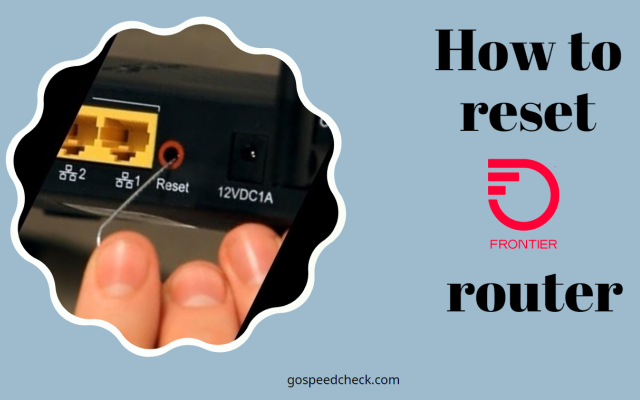
Step 1: You should find the reset button and press and hold it for about 15 seconds. You will notice that all the lights in the modem flash when the reset Centurylink modem has been initiated.
During this process, all of your devices will be out of the connection.
Step 2: The process will take up to five minutes to finish. You can apply new settings once it’s done.
How to reset CenturyLink wifi password?
How to set the admin password for CenturyLink modem?
Your administrator password or login information can be found on the back of your modem.
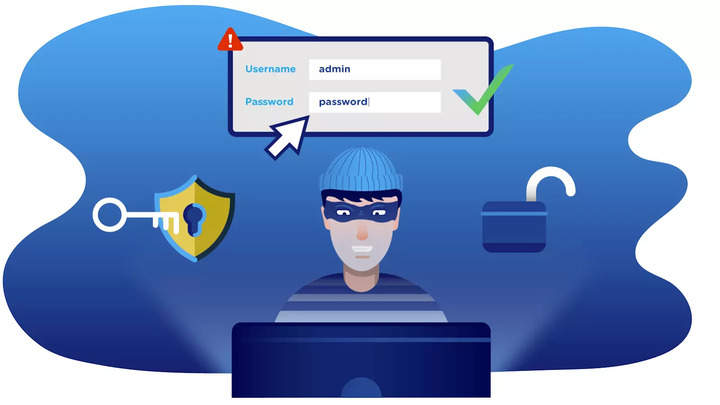
These details are quite simple to locate, and anyone with access to them can alter your Wi-Fi password, locking you out of your own Wi-Fi data supply.
Therefore, after purchasing the modem, you must also change the admin password.
How to change password on Centurylink modem? It’s so easy.
You only need to complete the steps in order to create a new admin password.
-
Go to the modem's settings by entering http://192.168.0.1 into the browser's address bar after signing in with the current password.
-
Click the Advanced Setup option when it appears. The Administrator Password option will appear under the Security section.
-
Set the Administrator Password to "Yes" and enter the new login and password.
-
To save your changes, click Apply. Then, sign in again to protect your account using the new passwords.
Set the admin password for CenturyLink modem
Things to note when changing CenturyLink wifi password
When conducting Centurylink wifi password change, you should create a strong password for security. Here are our suggestions:
Tips for password 64 bits or 128 bits:
-
For 64 bits: enter 10 characters
-
128 bits: enter 26 characters
In all cases, it is recommended that your password contains:
-
At least one number from 0 to 9
-
At least one uppercase letter
-
Be between 8 and 63 characters
A helpful tip: You can always log back into the Wireless Security menu and select "Use Default" for the password if you forget or lose your password.
This will restore it to the modem sticker's original setting.
Notes when changing wifi password
Read next: How to unblock device from wifi ?
When this happens, you will not change any settings either unless you have other devices that are already connected to it.
Remove all of the Wi-Fi networks that were previously saved on your device, then try reconnecting.
To start, try restarting the modem and see if it fixes the issue.
Conclusion
Is our guide helpful for you? We’ve learned how to change my CenturyLink wifi password in seconds. If you are stuck at a step, we’re always at your bay. Contact us to resolve the issue quickly.

0 Comments
Leave a Comment
Your email address will not be published. Required fields are marked *