Virgin WiFi Booster Set Up: A Detailed Set Up Tutorial (with Pictures)
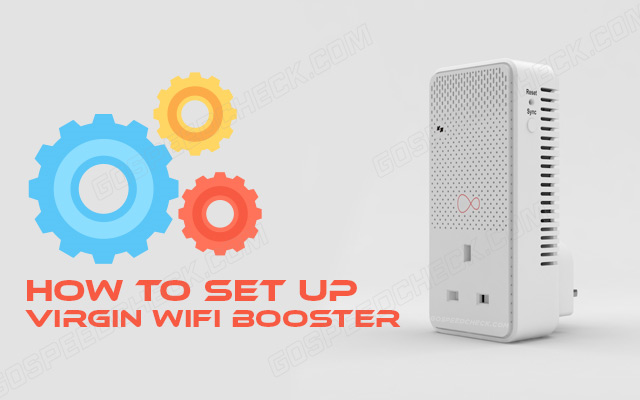
Virgin WiFi booster set up can be difficult to make if you’ve just bought it or don’t know about the technical.
However, it is not complicated.
This article will help you understand more about setting up Virgin WiFi booster easily and quickly.

A guide on Virgin Media WiFi booster setup
What Is a Virgin WiFi Booster?
Virgin boosters include main types: wired and wireless systems.
Yet, regarding convenience and practicality, a wireless booster is the prevalent choice of businesses and homeowners.
This equipment supports you to expand the network coverage with better signals from your workplace or house.
Thus, it gives a reliable and consistent connection to your devices such as smartphones, PC, or smart TV.
It will help you avoid network connectivity issues.
.png)
Virgin Internet booster
What to Consider Before Having a Virgin Booster Set Up?
When connecting a WiFi booster to your Virgin router, you must consider these basic things.
First, you must have a good quality signal from your wireless router.
Everything is fine if the router is in a central place without obstacles between it and the booster.
.png)
Things you need to consider before Virgin Media booster setup
Second, note that Virgin signal booster only boosts the received signal.
Thus, it cannot improve your signal if your router is in a bad location with many obstacles between your router and booster.
Last but not least, you need a compatible Virgin Media router.
The Super Hub 2 is a compatible router.
You can follow the steps below for how to connect Virgin WiFi booster if you have a suitable Virgin Media router with good signal quality.
How to Set Up Virgin WiFi Boosters?
How to set up a Virgin WiFi booster? Luckily, the process to set up Virgin Media WiFi Booster is quite simple.
Follow the steps below; you only take about 20 minutes to complete your process.

How to set up Virgin booster?
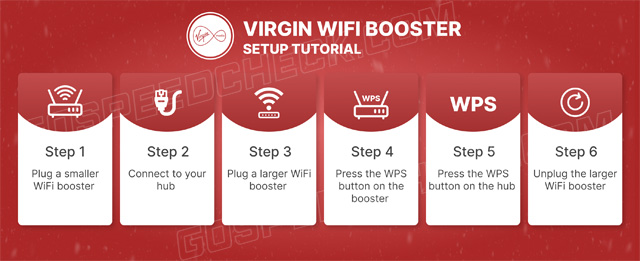
Plug a Smaller WiFi Booster
First, you will plug the smaller Virgin Media signal booster directly into the outlet for setting up the device.
You will know that your device is ready to run when your arrows start flashing red.
Besides, you also enable the power light on your equipment until it switches to white.
The white power light comes on as the arrows begin to flash orange or red.
You should plug your device directly into the main socket instead of an extension lead, surge protector, or power strip.
Connect to Your Hub
After you’ve plugged in the booster, the next step is connecting to your main hub.
This process of setting up Virgin Media WiFi Booster is quite simple. you only take about 20 minutes to complete it.
Plug a Larger WiFi Booster
Turn on the larger Virgin Media Internet booster by connecting it to a power socket in the same place.
You can know your device is operating properly when you find the connection light blinking red within 2 minutes.
.png)
Plug the larger WiFi booster
This light will go off, while the white power light can remain illuminated. You can wait for your device to turn on for at least 10 minutes.
This step is useful to let your software update and boost your device’s performance with a better-quality install and download.
Press the WPS Button on The Booster
Find the WPS button on your device and press and hold it. Wait for 10 minutes extra for software upgrades.
Your Boosters can not work correctly if you do not install these updates.
Press the WPS Button On the Hub
Keep holding the WPS button on Virgin Media Hub till the lights start flashing.
The Booster will start copying data from your Hub.
Once the Wireless LED on the Booster halts flashing and turns off, the copying is complete.
The power light remains turned on.
.png)
Press the WPS button
Read also: Bridge mode vs Access point
Unplug the Larger WiFi Booster
Here we come to the last step as to how to set up WiFi booster Virgin.
Disconnect the larger Booster and move it by unplugging it.
Put it in a convenient place in your house.
Once you activate the Booster back in the chosen place, the light process will be replicated.
You can use these simple tips to maintain your device’s performance:
-
Keep it in a dry place with good ventilation
-
Put your device away from the equipment that can cause signal interference and obstructions
-
Place it in the central location of your house
How to Set up an Additional Booster?
In addition to how to setup Virgin WiFi booster, do you want to know how to set up an additional booster?
Below are the specific steps you can do:
-
Step 1. Adding an Extra Booster
Attach the extra Booster to a power outlet in the same place as the Booster linked to the Hub.
Turn it on.
The Power light illuminates, and the connection network light will start to flash amber.
When the device begins to pair, the system light can flash red.
.png)
Add the additional booster
-
Step 2. Combine the extra booster
Keep the Sync side button of the current Booster attached to the Hub for three seconds.
The Connection light begins to flash rapidly. Keep the Sync icon on the extra Booster for three seconds in 2 minutes.
When paired, the connection light on both Boosters will also turn off.
-
Step 3. Put the booster in a convenient place
You may now unplug the extra device and relocate it to a more suitable area in your house.
Select internal walls without obstructions, including cabinets and shelves, but with full ventilation.
How Do I Know If My Virgin Booster Is Working?
.png)
Virgin booster is working
When the device is operational, it displays a power light.
"If the connection network light is lighting up red and the power light is decent white, your device is faulty to pair," according to Virgin Media.
Follow the simple steps below for the WiFi Boosters' manual pairing process.
-
Step 1. Push the 'Sync' icon on the device's side for 3 seconds.
-
Step2. Push the 'Sync' icon on the device's side for 3 seconds.
-
Step 3. Push the 'Sync' icon on the 2nd booster, and the linkage lights will flash.
When this process stops, the boosters have been successfully paired.
Virgin Wifi Booster Not Working: Causes & Fixes
There are many reasons why is my Virgin booster not working. Here are popular warning signs:
-
Utilize power outlets on walls rather than extension wires
-
Place something directly in front of the device, including shelves or cabinets
-
Put the booster near devices causing interference, such as adaptors
-
Ventilation doesn't work, so Boosters are hot for use
.png)
Causes why WiFi booster not working and solutions
If your WiFi Booster is not working, but only slowly, you also check your network speed through an WiFi speed test or take the following steps:
-
Switch Wireless internet on and off: To discover a stronger signal, try switching the WiFi trying to set it on and off on the device.
-
Keep the booster away from the devices causing interferences, such as washing machines and motors: Before using the device, try transferring to a new room or nearer to the booster.
-
Move the booster: Keep moving the booster to a different socket.
Indeed, boosting the WiFi is necessary. That’s why things like Straight Talk signal booster apps invented to help you.
If the Internet speed is still low, you need to find tips on how to make WiFi faster.
If it isn't working properly, reboot it. Pressing and holding the restart button for 5 seconds to accomplish this.
It will clarify the existing setup and permit you to begin again.
When it shows green arrows, it can accomplish a software upgrade.
If your internet network connection appears to be down, try restarting the hub. You may also check your area's status online.
Besides, call Virgin Customer Service to ask for their help if there's a problem with the line.
You may let go of the larger Booster after pressing and holding the WPS button for about 10 seconds.
The wireless networking and power systems lights will start to flash.
Retain the hub's WPS/Virgin Media button until the indicator lights flash.
The Boosters begin to imitate the Hub's specifics.
Conclusion
We’ve covered everything you need to know about the Virgin WiFi booster setup. It is a useful device that supports you in solving common network problems such as congestion, interruption, slow speed, and poor connection.
Hopefully, with the detailed guide in this article, you can know more about Virgin WiFi booster set up easily and quickly.

![How to Add Device to Optimum WiFi? 5 Super-Easy Steps [Tips]](https://gospeedcheck.com/filemanager/data-images/imgs/20221027/add-device-to-optimum-wifi.png)
![Best Straight Talk Signal Booster Apps & 5 Boosting Tips [Guide]](https://gospeedcheck.com/filemanager/data-images/imgs/20221027/straight-talk-signal-booster-apps.png)


4 Comments
Brian Carson
The boosters worked for about a year then they stopped working altogether
Leave a Comment
Your email address will not be published. Required fields are marked *MySpeed
Have you tried some solutions I mentioned earlier? If it's still not working, you should contact the Customer Service for more information
Leave a Comment
Your email address will not be published. Required fields are marked *Vincent Ramos
Awesome content as always. Thanks for this!
Leave a Comment
Your email address will not be published. Required fields are marked *MySpeed
You’re welcome!
Leave a Comment
Your email address will not be published. Required fields are marked *Leave a Comment
Your email address will not be published. Required fields are marked *