How to enable UPnP on ATT Uverse router: 3 Must-try steps
UPnP was built to fasten device communication. On many routers, except for AT&T, it is enabled by default.
So how to enable UPnP on ATT Uverse router?
Luckily, this post shows how to activate UPnP on ATT routers.
For this reason, if you have an ATT router and want to use it to its full potential, you must check it right away!
A guide on enabling UPnP on ATT Uverse router
What is UPnP on ATT Uverse router?
First, it’s worth understanding what UPnP on ATT Uverse router means.
A collection of networking protocols called UPnP (Universal Plug and Play) enables communication between devices on your network.
Once authorized, UPnP devices on the same network may automatically detect additional UPnP ones.
If you have an AT&T router, UPnP can remotely port forward the router so that your computer and other wireless nodes can check each other's network availability.
Consequently, you won't need to manually port-forward any devices, saving you effort and time.
However, your laptops or desktop computers do not come with pre-installed UPnP devices like headphones, keyboards, or mice.
UPnP on ATT Uverse router
It should also be noted that an older model router may not support this feature, in which case you will not see it in the control panel.
In this regard, we advise you to see if your particular model is UPnP compatible by searching for it on Google.
If it is, we'll next look at how to enable it.
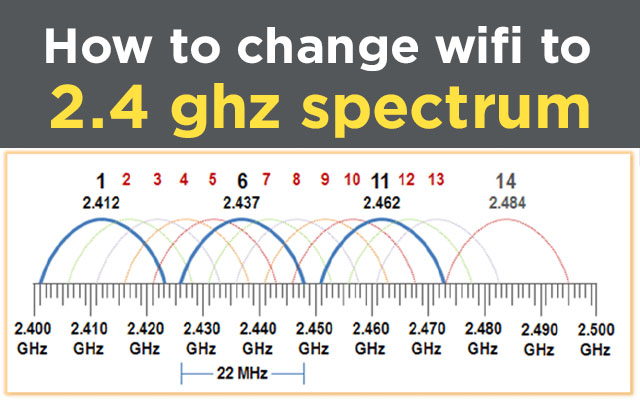
Read also: How to change Wifi to 2.4 GHz Spectrum?
Why do people enable UPnP?
The connectivity and user-friendliness of UPnP are the primary reasons users enable it on their routers.
As previously mentioned, this feature makes it simple to link various smart household gadgets to the home network.
Gaming is another factor that makes most people want to enable UPnP on their routers.
Gaming consoles like the PlayStation or Xbox need the NAT type to be set to open or moderate to connect to the gaming server.
Meanwhile, enabling UPnP makes it possible automatically.
So great, right?
Enabling UPnP has several benefits
UPnP, however, doesn't demand any authentication, posing a serious security issue.
For just this reason, not all AT&T routers are capable of using this capability.
Besides, if you run a WiFi speed test and get a slow Internet speed, UPnP cannot make it better.
As to how to make WiFi faster, you will need to try other methods.
Does your AT&T router support UPnP?
AT&T uses fiber optic cables and phone lines (DSL) to deliver its internet services.
You're in luck if your internet connection is a phone line because there's a strong possibility your router will support UPnP and you can use this function.
Unfortunately, AT&T does not permit this feature for its fiber optic customers due to security concerns.
UPnP is not available to fiber optics
But do not lose hope if you are a gamer who belongs to the latter group.
To make it function, a couple more things must be done, which will be mentioned later!
How to enable UPnP on ATT Uverse router?
Now, we have come to the main part of today’s topic.
Let’s check 3 steps to enable UPnP on ATT Uverse router.
Step 1: Connect the modem to your PC
You are undoubtedly accessing the internet through AT&T if you own an ATT router.
Through DSL and fiber optic connections, the phone company provides internet services.
Therefore, connecting your router to your computer using an Ethernet wire is the first step in configuring UPnP on your router.
Use an Ethernet cable that has been shown to function, and attach one end to the yellow section of your modem and the other to the motherboard or WLAN card of your computer.
You can move on to the following step if the wired connection is established.
Connect the modem to your computer
Step 2: Enter the router’s control panel
The next step is to access the router's control panel, where you should enable UPnP, after you have connected your router to your computer with an Ethernet wire.
To access the router's control panel, follow the steps below.
-
On the keyboard of your computer, press the Windows key, or click the Start button in the bottom left corner of the screen.
-
Enter "cmd" in the search field to bring up the computer's command prompt.
-
Choose "Run as Administrator" from the context menu when you right-click the command prompt.
-
Enter "ipconfig" once the prompt appears to continue.
-
A list of IP addresses will appear now. Highlight the Default Gateway in the popup, then press Enter to copy it.
-
Then, open the browser on your computer, paste the 198.162.1.1 address for the Default Gateway that you copied, and press Enter.
-
Put your default login information in the corresponding areas. You will be taken to the router's control panel when you press Enter.
Access the router's control panel
Step 3: Enable UPnP from control panel
Enabling UPnP is done using the router's control panel.
You can therefore find a list of your network's devices by going to the "Home Network" tab in your router's control panel when you log in.
Under the “Advanced Features” or “More Functions” tab, you may locate the UPnP options.
The UPnP settings may fall under one of the categories above based on the type of router you are now using.
Hold down the CTRL and F keys together to open a search bar, which will relieve the burden of trying to find the UPnP settings.
In the search field, type and enter "UPnP setting."
Now, toggle the empty box in the UPnP setup to turn it on.
Instruction on how to enable UPnP on ATT Uverse router
In case you use an Arris modem and don’t know how to hook up Arris modem to wireless router, you can check our upcoming post for more details!
What to do if UPnP doesn't work on ATT Uverse router?
The “UPnP not successful” error message appears when the firmware on your router is out of date.
This error message will appear in your router's control panel's Network Settings console if UPnP does not work properly.
But don't worry, it is simple to fix.
Follow the instructions below to resolve the UPnP not successful error message:
-
Access the router's control panel. If you are unsure of how, go back to the previous step, which is how to enter the control panel.
-
Find and access the "Update" tab on the router's control panel.
-
Look for "Scan/search for update" under the Update tab.
The available firmware should be displayed, and you should download and install it.
In addition, you can restart your computer and modem to see if the UPnP not successful error disappears.
This ought to fix the problem as well.
Restart the computer it UPnP is unsuccessful
You can perform a power cycle by disconnecting all of your electronics and waiting for three to five minutes.
After reconnecting everything, go back to step 2's router control panel and toggle off and on your UPnP settings.
Last but not least, look for the error; if you find it, contact your Internet provider and describe all of your previous attempts.
With any luck, they will quickly identify the cause and rectify it.
How to enable UPnP if you have AT&T fiber optics?
Unfortunately, there is no possibility for you to enable UPnP on your router if you fall under this category.
ATT fiber optics can’t enable UPnP
There are, however, one or more solutions to your issue, based on why you wish to do this.
First, you may buy a different router from Amazon or another retailer, connect it to the current AT&T router.
Then, enable UPnP on the new device if you need it for connectivity.
Moreover, there are alternative ways to convert your NAT to open if you play video games.
Using port forwarding or configuring your console as a DMZ, for instance.
Conclusion
As you see, UPnP is a very helpful function that enables networked PCs to automatically configure the router. Since the system uses dynamic discovery to locate an IP address, it is considerably more efficient than configuring each device separately. So at last, we hope our guide on “how to enable UPnP on ATT Uverse router?” will be helpful to you.


4 Comments
Kaleb May
Does ATT router support UPnP or NAT PMP?
Leave a Comment
Your email address will not be published. Required fields are marked *MySpeed
In fact, the AT&T Gateway does not support UPnP or NAT-PMP
Leave a Comment
Your email address will not be published. Required fields are marked *Jacob Simpson
It took almost 10 minutes to read the post, but worth it.
Leave a Comment
Your email address will not be published. Required fields are marked *MySpeed
Happy to help
Leave a Comment
Your email address will not be published. Required fields are marked *Leave a Comment
Your email address will not be published. Required fields are marked *